Are you feeling nervous about the physical strain and emotional ups and downs of pregnancy?. The gentle movements of prenatal yoga poses are designed to help expecting mothers stay active, relaxed, and connected to their changing bodies. These poses support flexibility, ease back pain, improve circulation, and prepare the body for childbirth.
Beyond the physical benefits, prenatal yoga also encourages mindfulness and emotional balance, helping mothers-to-be bond with their babies and manage stress with calm and confidence. Whether you’re in your first trimester or nearing delivery, they can make the experience of pregnancy smoother and more empowering
What is Prenatal Yoga and Why Does It Matter?
Pregnancy brings major physical and emotional changes. Your body stretches, joints loosen, and energy levels fluctuate. Prenatal yoga poses support these changes safely. They combine gentle movement, mindful breathing, and relaxation to strengthen muscles, improve flexibility, and reduce stress while preparing the body for childbirth.
Unlike regular yoga, prenatal yoga poses adapts poses for your changing body. Each movement helps maintain good posture, reduces aches, and strengthens back and pelvic muscles. Breathwork calms the nervous system, improves oxygen flow, and deepens your connection with your baby. Each pose should feel gentle yet purposeful, letting you notice tension release and muscle engagement.
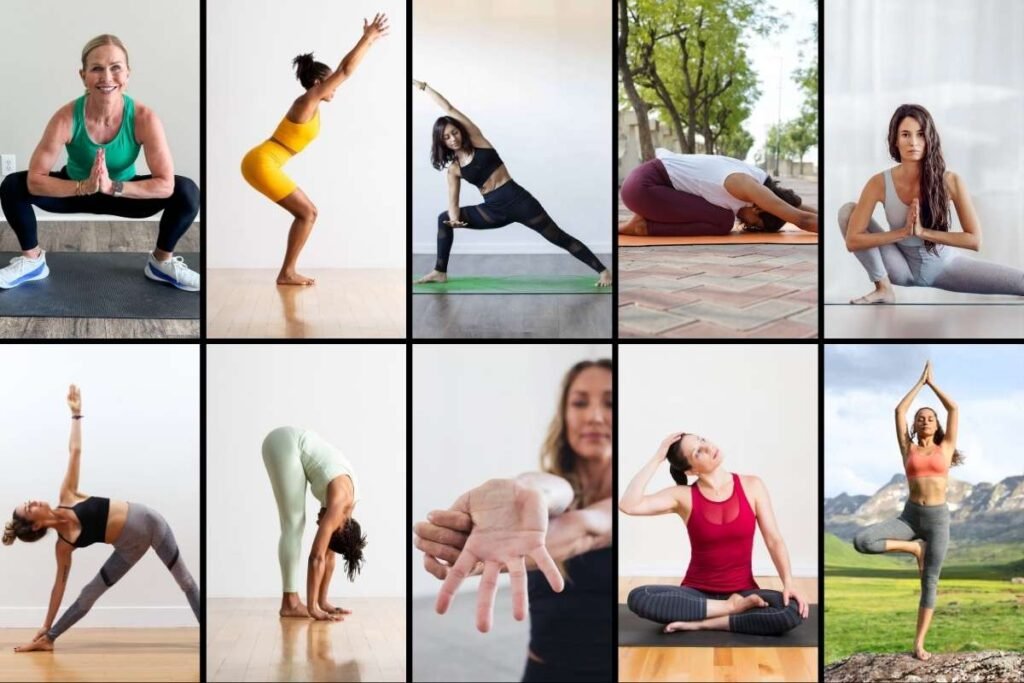
Here are the 40 Essential Prenatal Yoga Poses for Every Trimester
This is a complete guide to prenatal yoga poses, carefully divided by trimester. Each pose includes step-by-step instructions, how it should feel, and key benefits to support a safe, comfortable, and mindful pregnancy journey.
First Trimester (Weeks 1–13): Gentle Foundations
Early pregnancy is a time of adjustment. Fatigue, nausea, and hormonal shifts may affect your energy levels. The goal in this trimester is to focus on prenatal yoga poses that have gentle stretches, breath awareness, and spinal support while gradually building strength and flexibility.
1. Cat-Cow Stretch (Marjaryasana-Bitilasana)
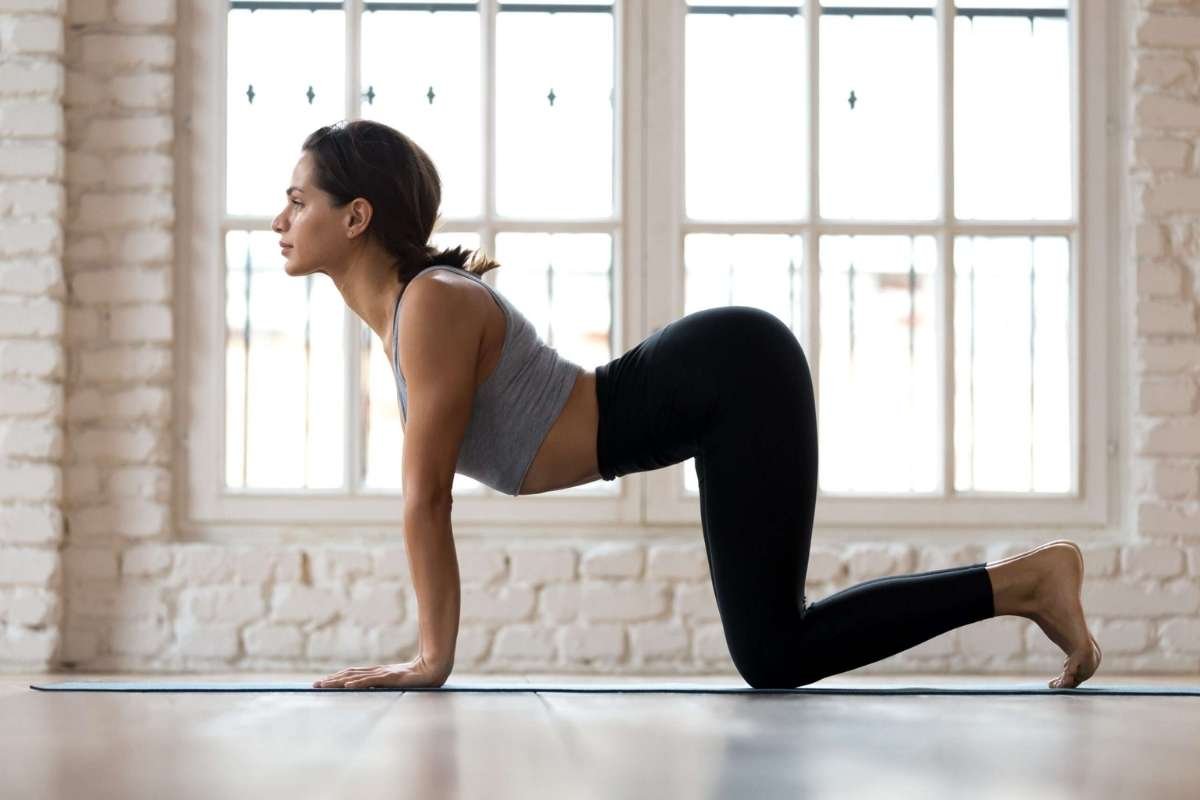
This gentle spinal movement helps your back adjust to early pregnancy changes. The fluid motion between arching and rounding the spine encourages flexibility while easing tension in the lower back and shoulders. Practicing this pose also stimulates circulation and prepares your body for more complex poses in later trimesters. It is a mindful way to connect your breath with movement and notice changes in posture and flexibility.
Step-by-Step:
- Begin on hands and knees, wrists under shoulders, knees under hips.
- Inhale, arch back, lifting chest and tailbone (Cow).
- Exhale, round spine, tucking chin and tailbone (Cat).
- Repeat 5–8 times slowly.
How It Should Feel: A wave along the spine; chest opens on inhale; belly expands gently; shoulders release tension.
Benefits: Enhances spinal mobility, relieves early back stiffness, promotes gentle digestion, and supports mindful breathing.
2. Bound Angle Pose (Baddha Konasana)
This seated hip opener improves flexibility and circulation in the pelvic area. It gently stretches the inner thighs, groin, and hips while keeping the spine upright and supported. It can help relieve lower back tension that often accompanies early pregnancy. Practicing regularly also encourages proper posture as your body begins to shift.
Step-by-Step:
- Sit with soles together, knees outward.
- Hold feet or ankles, shoulders relaxed.
- Use pillows under knees if needed.
- Breathe deeply for 1–2 minutes.
How It Should Feel: Inner thighs and groin open gradually; hips soften; spine lengthens; belly feels free.
Benefits: Prepares hips for labor, improves pelvic circulation, relieves lower back tension, and increases comfort while seated.
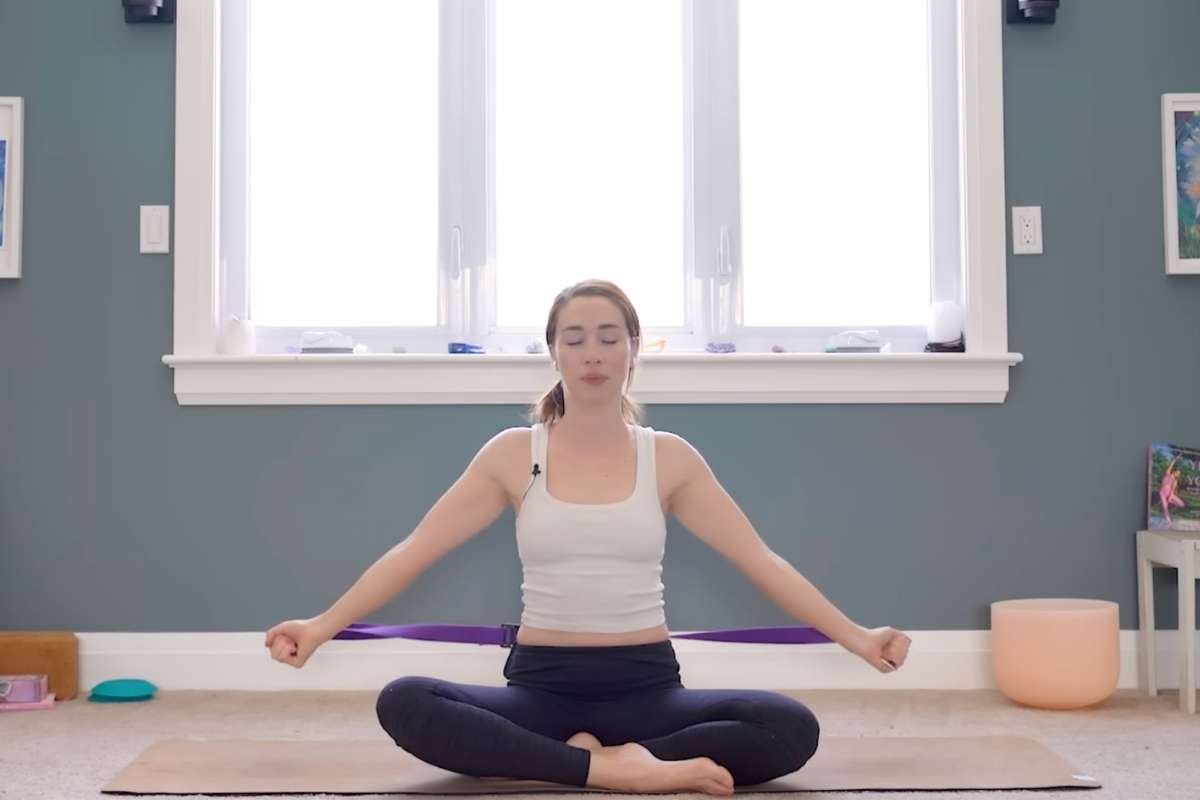
3. Easy Pose with Deep Breathing (Sukhasana)
This pose promotes calmness and body awareness during early pregnancy. Sitting tall with relaxed shoulders and mindful breathing helps counter stress and fatigue. It strengthens the spine and respiratory muscles while encouraging a gentle stretch in the hips. It also supports mental focus and connection with your baby.
Step-by-Step:
- Sit cross-legged or on a cushion.
- Spine tall, shoulders relaxed.
- Inhale through the nose, exhale through the mouth.
- Continue for 2–3 minutes.
How It Should Feel: Ribcage expands with each inhale; shoulders soften; mind feels centered; belly feels supported.
Benefits: Reduces stress and anxiety, improves posture, strengthens breathing muscles, and encourages a calm, mindful state.
4. Mountain Pose (Tadasana)
A standing foundational pose, Mountain Pose promotes balance and alignment. It engages the legs, strengthens the core, and aligns the spine, preparing the body for weight changes in pregnancy. Practicing this pose regularly enhances body awareness and helps maintain proper posture throughout the day.
Step-by-Step:
- Stand feet hip-width apart.
- Engage thighs, lift chest, arms relaxed.
- Hold 30–60 seconds; breathe evenly.
How It Should Feel: Weight balanced evenly on both feet; spine long; core gently engaged; shoulders relaxed.
Benefits: Strengthens legs and core, enhances posture, improves balance, and supports body alignment during pregnancy.
5. Side Stretch
This standing stretch gently lengthens the lateral torso and opens the ribcage. It encourages deeper breathing and alleviates tension along the sides and lower back. Regular practice helps maintain spinal flexibility and supports lung expansion as the uterus grows.
Step-by-Step:
- Stand feet hip-width.
- Right hand on hip, left arm overhead.
- Lean gently to the right; hold 15–20 seconds.
- Switch sides.
How It Should Feel: Stretch along ribs and side torso; shoulders relaxed; torso lengthens gently.
Benefits: Promotes spinal flexibility, enhances lung capacity, relieves mid-back tension, and energizes the body.
6. Seated Spinal Twist (Modified)
A gentle twist for spinal mobility, this pose is safe for early pregnancy when the belly is still small. It encourages posture awareness, stimulates digestion, and releases tension in the back and shoulders. The key is to avoid compressing the belly and move mindfully with each breath.
Step-by-Step:
- Sit cross-legged, spine tall.
- Right hand on left knee, left hand behind for support.
- Twist gently; keep belly soft.
- Hold 15–20 seconds; switch sides.
How It Should Feel: Spine rotates gently; shoulders soften; torso lengthens; breath remains smooth.
Benefits: Improves spinal mobility, eases back tension, supports digestion, and strengthens core awareness.
7. Standing Side Bend
This standing stretch helps open the lateral torso and supports posture. It also stretches the intercostal muscles around the ribs, promoting deeper breathing. Prenatal yoga poses like the Standing Side Bend can ease tension in the lower back and sides that often occurs in early pregnancy.
Step-by-Step:
- Stand feet shoulder-width apart.
- Inhale, raise arms overhead.
- Exhale, bend to the right; keep hips square.
- Hold 10–15 seconds; switch sides.
How It Should Feel: Lateral torso stretches gradually; ribs expand; shoulders remain relaxed.
Benefits: Improves lung capacity, reduces side tension, enhances posture, and energizes the body.
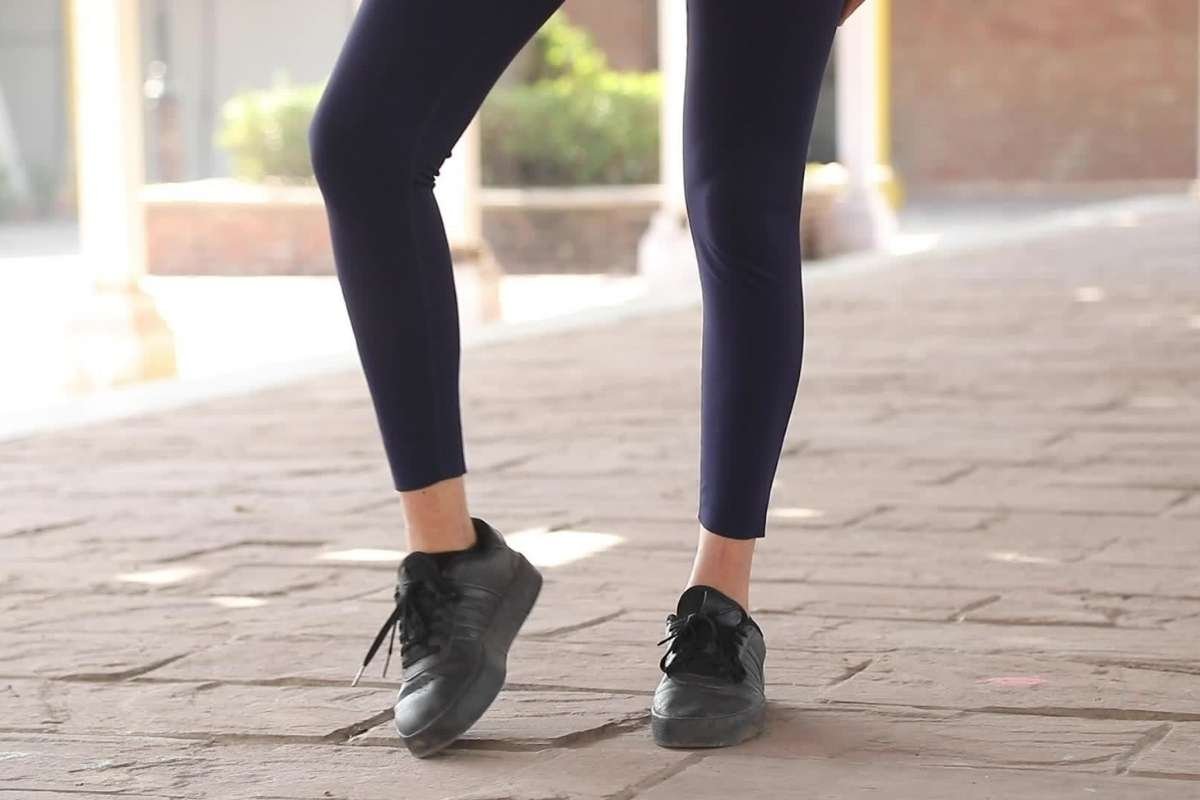
8. Heel Raises
Heel raises strengthen the calves and improve circulation, helping prevent swelling and varicose veins common in early pregnancy. They also activate core muscles slightly, promoting stability. This simple exercise supports lower-body endurance and balance.
Step-by-Step:
- Stand near a wall or chair for support.
- Lift heels slowly; balance on the balls of feet.
- Lower heels gently; repeat 10 times.
How It Should Feel: Calves engage; feet rooted; slight core activation; shoulders relaxed.
Benefits: Strengthens calves, reduces swelling, improves circulation, and supports balance.
9. Neck Rolls
Neck rolls release tension in the neck and upper shoulders, which often stiffen during pregnancy. Gentle rotation stimulates blood flow, reduces headaches, and promotes relaxation. This pose also helps maintain alignment in the cervical spine.
Step-by-Step:
- Sit or stand comfortably.
- Slowly roll your head in circles, five times each direction.
How It Should Feel: Neck muscles release; shoulders soften; head feels light; breathing calm.
Benefits: Reduces tension, improves posture, alleviates headaches, and promotes relaxation.
10. Shoulder Shrugs and Rolls
Shoulder rolls loosen upper back and shoulder tension caused by early pregnancy posture shifts. This pose encourages proper shoulder alignment and improves circulation. It also helps prepare your shoulders for lifting and carrying your baby later.
Step-by-Step:
- Inhale, lift shoulders to ears.
- Exhale, roll your shoulders backward and down.
- Repeat 10–15 times.
How It Should Feel: Upper back loosens; shoulder blades release; breath flows smoothly.
Benefits: Reduces tension, supports posture, and strengthens shoulder stability.
11. Seated Side Stretch
This pose gently stretches the side body and opens the ribs. It helps release tension in the back and improves breathing capacity. Practicing this stretch encourages mindfulness as you focus on lengthening the torso. It can also relieve mild tightness in the hips and lower back during early pregnancy. Maintaining an upright spine allows safe engagement of core muscles.
Step-by-Step:
- Sit cross-legged or on a cushion.
- Place your right hand on the floor; raise your left arm overhead.
- Lean gently to the right, keeping the spine long.
- Hold for 10–15 seconds; switch sides.
How It Should Feel: Side body stretches gently; ribs expand; torso lengthens; shoulders relax.
Benefits: Enhances breathing, reduces mid-back tension, improves posture, and supports spinal flexibility.
12. Butterfly Pose
Butterfly pose opens the hips and stretches inner thighs, promoting pelvic flexibility. It encourages mindful breathing while keeping the spine straight. Gentle movement of the knees in a flapping motion can increase hip circulation and ease early pregnancy tension. It also helps prepare the body for labor by loosening tight muscles.
Step-by-Step:
- Sit with soles of the feet together, knees outward.
- Hold your feet; gently flap the knees like butterfly wings.
- Continue for 1–2 minutes.
How It Should Feel: Hips open gradually; inner thighs stretch; spine upright; breath calm.
Benefits: Opens hips for labor, reduces pelvic tension, improves flexibility, and promotes relaxation.
13. Seated Forward Fold (Modified)
This gentle forward fold stretches the spine, hamstrings, and hips without compressing the belly. It relieves early pregnancy back discomfort and promotes calmness. Sitting with legs slightly apart accommodates your belly and allows deeper breathing. Practicing it mindfully helps cultivate awareness of your body and breath.
Step-by-Step:
- Sit with legs slightly apart.
- Hinge forward from the hips, reaching gently toward your feet.
- Use a cushion under the knees if needed.
How It Should Feel: Hamstrings and spine stretch gently; belly free; shoulders relaxed; breath smooth.
Benefits: Reduces back stiffness, improves flexibility, calms the nervous system, and promotes relaxation.
14. Wrist Stretch
Wrist stretches release tension in the forearms and prepare wrists for lifting your baby later. It also increases circulation and prevents stiffness. Practicing this pose regularly can prevent discomfort from repetitive hand movements.
Step-by-Step:
- Extend one arm forward, palm up.
- Gently pull back the fingers with your opposite hand.
- Hold 10 seconds; switch sides.
How It Should Feel: Front wrist stretches; elbow relaxed; shoulders soft; gentle pressure only.
Benefits: Strengthens wrists, prevents strain, improves flexibility, and supports daily tasks during pregnancy.
15. Ankle Circles
Ankle circles improve joint mobility, circulation, and balance. They are particularly useful during pregnancy to prevent swelling and reduce tension in the lower legs. Prenatal yoga poses the focus on the legs, stabilizes muscles while allowing relaxation.
Step-by-Step:
- Lift one foot and rotate the ankle slowly in circles, 10 times each way.
- Switch to the other foot.
How It Should Feel: Gentle mobilization of ankle and foot; subtle activation of leg muscles; balanced posture.
Benefits: Increases circulation, reduces swelling, strengthens ankle stabilizers, and improves balance.
16. Pelvic Tilts
Pelvic tilts strengthen core muscles and relieve lower back tension. This pose encourages awareness of pelvic alignment and helps maintain flexibility. It also prepares the body for labor by mobilizing the pelvis and lower back gently.
Step-by-Step:
- Lie on your back, knees bent, feet flat on the floor.
- Inhale, tilt pelvis forward; exhale, tilt back.
- Repeat 10–15 times slowly.
How It Should Feel: Lower back presses gently into the floor; core engages lightly; belly supported; shoulders relaxed.
Benefits: Strengthens abdominal and pelvic muscles, relieves back tension, and improves posture.
17. Side-Lying Stretch
Side-lying stretches open the torso and hips while keeping the spine neutral. This position is gentle for early pregnancy and encourages relaxation. It also helps alleviate tension in the lower back and improves circulation.
Step-by-Step:
- Lie on your left side, knees slightly bent.
- Extend the top arm overhead and lengthen the side body.
- Hold 20–30 seconds; switch sides.
How It Should Feel: Side body lengthens; spine supported; belly free; gentle stretch along obliques.
Benefits: Opens hips and torso, relieves lower back tightness, improves circulation, and encourages calm focus.
18. Seated Shoulder Stretch
This stretch releases tightness in the upper back and shoulders, common in early pregnancy. It helps maintain shoulder mobility and supports proper posture. It can also reduce tension headaches caused by forward head posture. It also improves blood flow around the shoulder blades, which helps reduce stiffness after long hours of sitting.
The slow movement makes it easy to control, so it feels safe for beginners. Many women find it calming because the stretch encourages steady, relaxed breathing.
Step-by-Step:
- Sit tall with a straight spine.
- Reach your right arm across your chest and pull gently with the left hand.
- Hold for 10–15 seconds; switch sides.
How It Should Feel: Upper back and shoulders release tension; neck softens; breath remains smooth.
Benefits: Reduces shoulder tension, improves posture, maintains mobility, and supports upper body strength.
19. Standing Forward Fold (Modified)
A modified forward fold stretches the hamstrings and spine safely. It relieves tension in the lower back and legs while encouraging calm focus. Using props or keeping a slight bend in the knees prevents strain on the belly. You can also rest your hands on a block to maintain balance as your center of gravity shifts. The pose supports gentle lengthening without compressing the abdomen, making it easy to adapt as pregnancy progresses.
Step-by-Step:
- Stand feet hip-width apart.
- Hinge forward from the hips; hands rest on thighs or a chair for support.
- Keep knees soft; spine long.
How It Should Feel: Hamstrings stretch; lower back lengthens; belly free; shoulders relaxed.
Benefits: Reduces back tension, improves flexibility, calms the nervous system, and relieves leg tightness.
20. Side-Lying Knee Hug
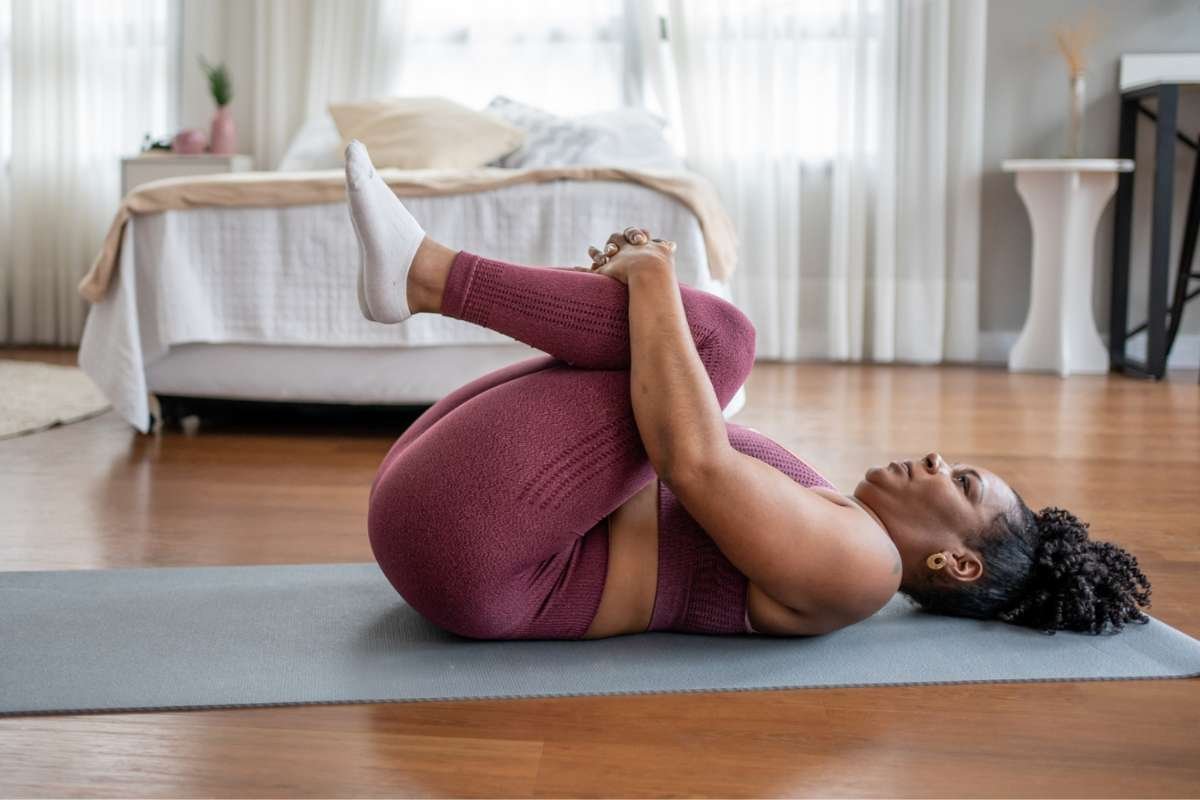
This pose gently stretches the glutes, hips, and lower back. It also encourages awareness of pelvic alignment and relaxation. Practicing this pose regularly can reduce mild lower back discomfort.
Step-by-Step:
- Lie on your left side.
- Bring your right knee toward your chest; hold 10–15 seconds.
- Switch sides.
How It Should Feel: Glutes and lower back stretch gently; hips relax; belly free; gentle tension release.
Benefits: Relieves lower back stiffness, eases hip tightness, improves circulation, and promotes comfort.
Second Trimester (Weeks 14–27): Strength and Stability
Energy levels usually return, but your center of gravity shifts. The prenatal yoga poses at this time of pregnancy focus on strengthening legs, core, and pelvis, while keeping stretches gentle for balance.
21. Warrior II (Virabhadrasana II)
This pose strengthens legs, opens hips, and encourages balance. It promotes stamina and endurance during mid-pregnancy while gently engaging the core. Practicing this pose also improves focus and posture.
Step-by-Step:
- Stand with feet wide apart; right foot forward, left foot back.
- Bend the front knee over the ankle.
- Extend arms sideways, gaze forward.
- Hold 30 seconds; switch sides.
How It Should Feel: Legs strong; hips open; chest lifted; core engaged; steady balance.
Benefits: Strengthens legs and core, improves balance, opens hips for labor, and enhances posture.
22. Goddess Pose (Utkata Konasana)
The Goddess pose opens the hips and strengthens the lower body. It also encourages pelvic alignment and increases endurance. Practicing this pose can relieve lower back and pelvic pressure. It also engages the core and inner thighs in a supportive way that feels steady rather than intense. Many women find that holding this pose builds confidence and improves stability as their body changes through each trimester.
Step-by-Step:
- Stand feet wider than hips; toes slightly out.
- Bend knees and lower hips; spine tall.
- Extend arms or rest on thighs; hold 30–45 seconds.
How It Should Feel: Hips and inner thighs open; legs strong; spine upright; breath steady.
Benefits: Strengthens pelvic floor, opens hips for labor, reduces lower back strain, and improves balance.
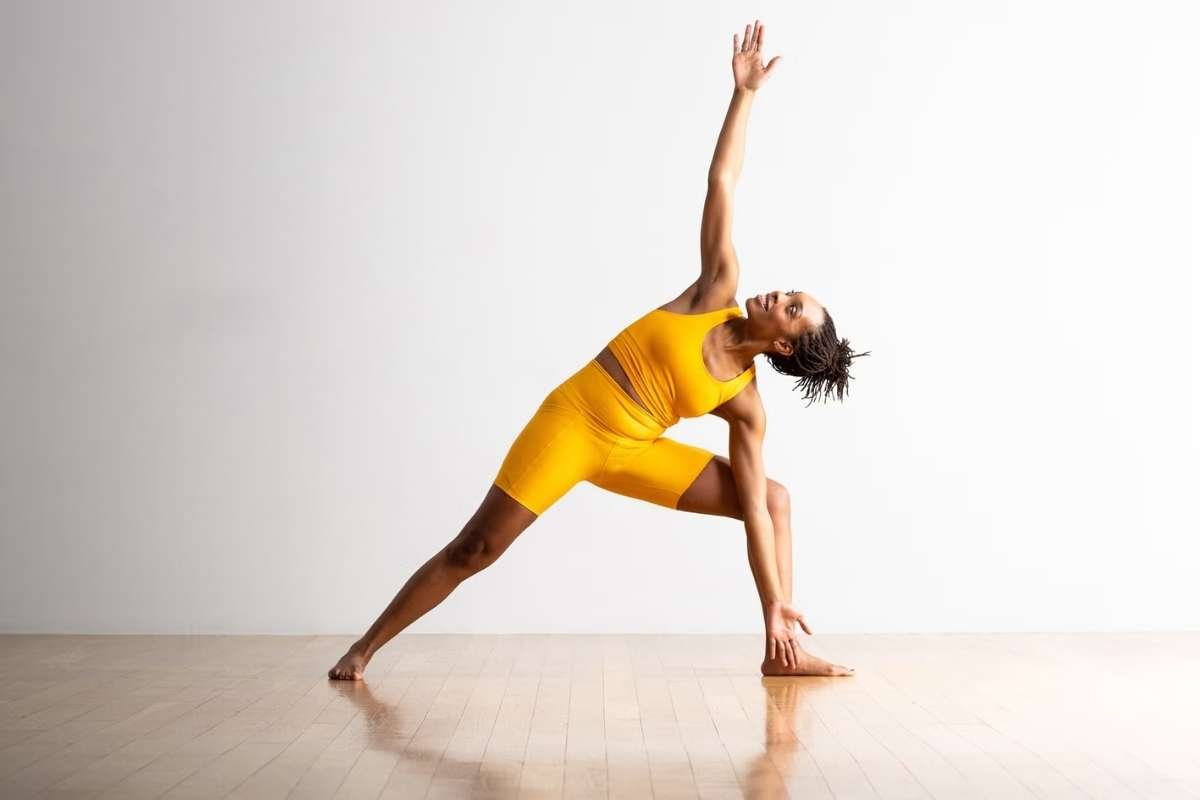
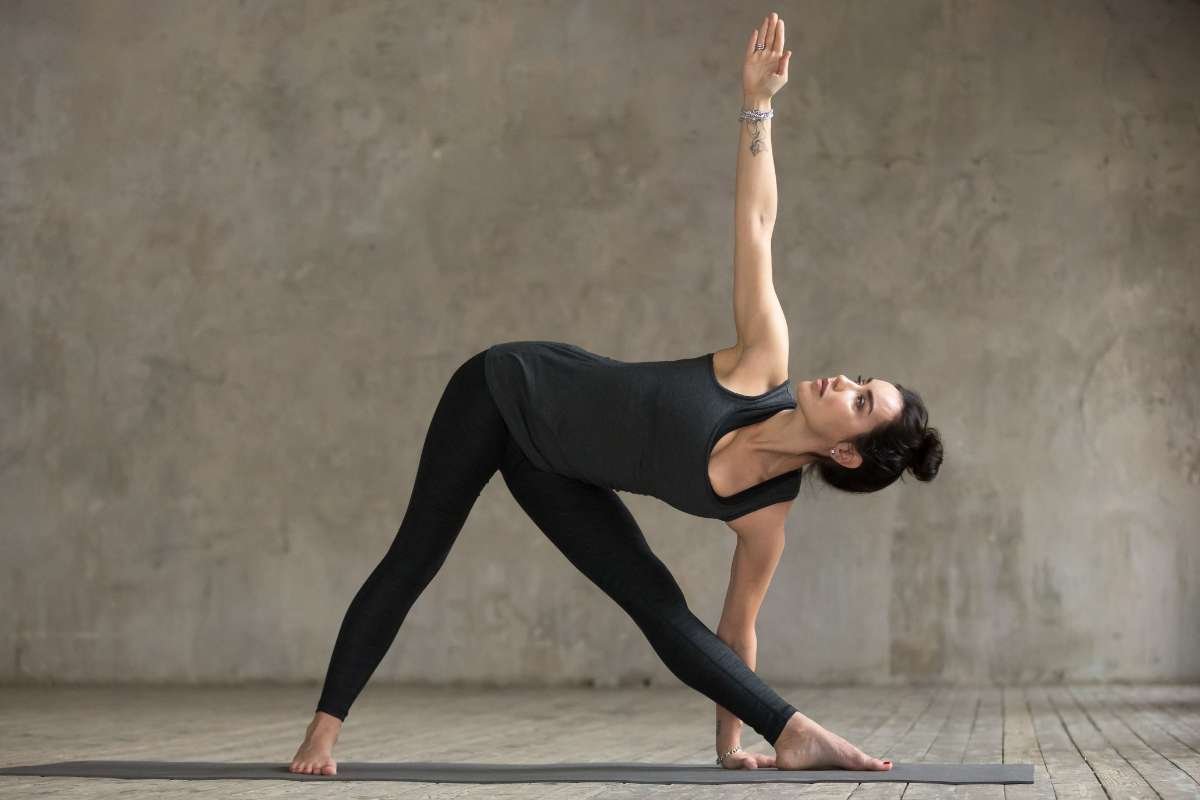
23. Triangle Pose (Trikonasana)
The triangle pose stretches the side body, hamstrings, and hips. It improves posture and helps balance energy during mid-pregnancy. Proper alignment avoids pressure on the belly while still strengthening legs.
Step-by-Step:
- Stand feet wide; right foot forward.
- Extend arms sideways; hinge over the front leg.
- Place a hand on the shin or block; gaze upward.
- Hold 20–30 seconds; switch sides.
How It Should Feel: Side body lengthens; hamstrings stretch; chest opens; spine tall.
Benefits: Opens hips and chest, strengthens legs, improves posture, and reduces back tension.
24. Wide-Legged Forward Bend (Prasarita Padottanasana)
This forward fold stretches the hamstrings and spine while keeping the belly free. It encourages calm focus and improves circulation in the legs. A slight bend in the knees prevents strain. It can also help release stiffness that builds up from sitting for long periods. Many women find the gentle inversion refreshing, as it creates a light, spacious feeling in the back and hips.
Step-by-Step:
- Stand with feet wide apart.
- Hinge forward from the hips; hands rest on the floor or a block.
- Keep knees soft; spine long.
How It Should Feel: Hamstrings stretch; spine lengthens; neck relaxes; belly free.
Benefits: Relieves back tension, stretches legs, calms mind, improves circulation.
25. Half Moon Pose (Ardha Chandrasana)
This balancing pose strengthens legs, opens hips, and improves coordination. Prenatal yoga poses like these also engage the core gently, which supports a growing belly. Mindful alignment helps prevent strain and encourages stability during pregnancy.
Step-by-Step:
- Stand with feet hip-width apart; shift weight to the right foot.
- Lift left leg parallel to the floor; extend left arm upward.
- Reach right hand toward the floor or a block.
- Hold 15–20 seconds; switch sides.
How It Should Feel: Balance challenges gently; spine long; hips open; legs active.
Benefits: Improves balance, strengthens legs and core, stretches side body, enhances focus.
26. Side Lunge (Skandasana)
Side lunges open hips, strengthen thighs, and improve pelvic flexibility. They also enhance lower-body stability, preparing muscles for labor. Proper alignment ensures safe stretching without strain.
Step-by-Step:
- Stand with feet wide apart.
- Bend right knee, shift weight while keeping left leg straight.
- Keep spine tall; chest lifted.
- Hold 15–20 seconds; switch sides.
How It Should Feel: Inner thighs and hips stretch; legs active; spine upright; breath steady.
Benefits: Opens hips, strengthens thighs, improves balance, enhances pelvic flexibility.
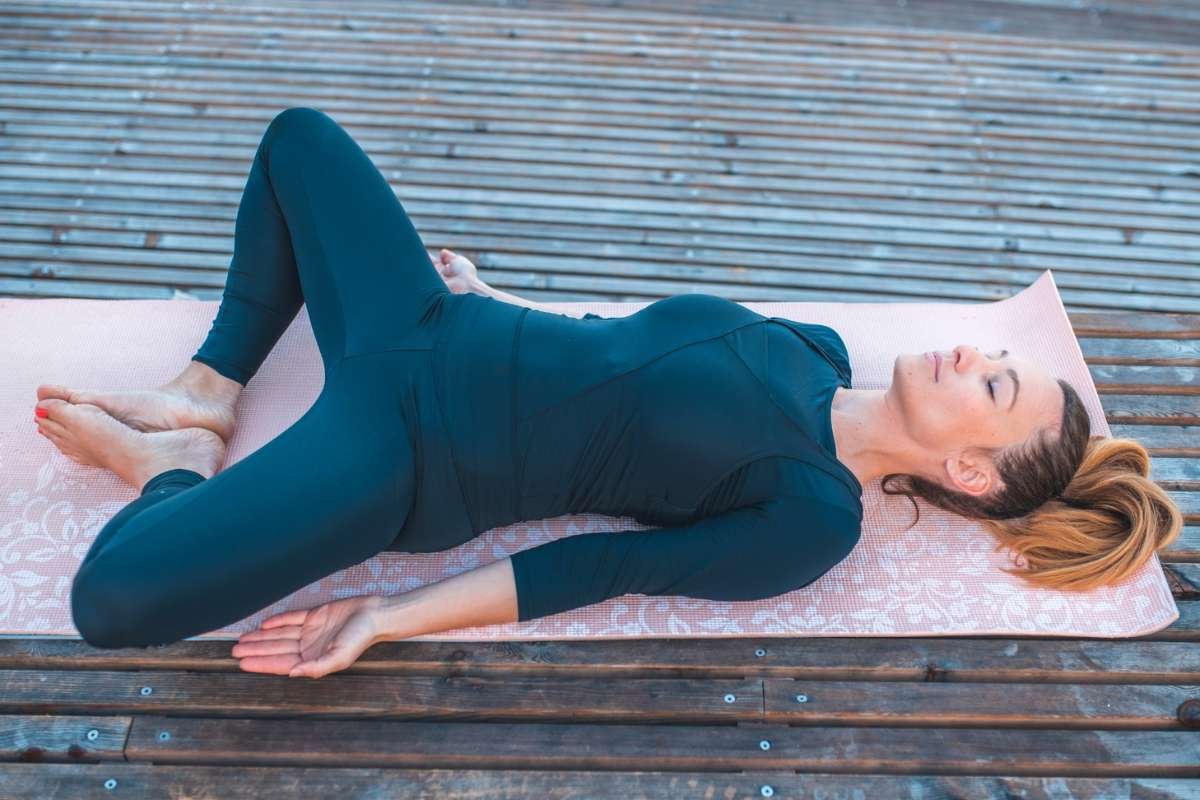
27. Supported Bridge Pose (Setu Bandhasana)
This gentle backbend strengthens the glutes, lower back, and pelvic muscles. A cushion or block under the sacrum supports the belly and reduces strain. It also opens the chest for better breathing. When you settle into the lift, you may feel a steady, grounded strength rising from your hips. The supported height also creates a soft stretch across the front body, helping you breathe with more ease and space.
Step-by-Step:
- Lie on your back, knees bent, feet hip-width apart.
- Place a block under the sacrum for support.
- Lift hips gently; relax shoulders and arms.
- Hold 20–30 seconds.
How It Should Feel: Hips lift without pressure on the belly; chest opens; glutes and lower back engage lightly.
Benefits: Strengthens glutes and back, opens chest, improves circulation, supports pelvic floor.
28. Wide Child’s Pose (Balasana – Modified)
This resting pose stretches the hips and spine safely. Widening the knees accommodates the belly, allowing full relaxation. It helps relieve lower back tension and promotes calm breathing. As you settle into the pose, you may feel your hips soften and the weight of your belly supported without pressure. The gentle forward fold also encourages a slow, steady breath that helps quiet the mind and release built-up fatigue.
Step-by-Step:
- Kneel on the mat; knees wide apart.
- Sit back on heels; extend arms forward.
- Rest your forehead on the floor or a cushion.
- Breathe deeply for 1–2 minutes.
How It Should Feel: Hips and back release gently; belly free; shoulders relax; breath deepens
Benefits: Relieves back and hip tension, encourages relaxation, improves circulation, calms the mind.
29. Supported Side Angle Pose
This pose stretches the side body, opens the hips, and strengthens the legs. Using a block for support ensures safety for the belly. It encourages a mindful posture and engages the core gently. As you move into the stretch, you should feel a long, steady pull along the ribs and waist without any compression in the abdomen. The grounded stance also creates a sense of stability, helping you stay balanced and supported as your body changes.
Step-by-Step:
- Stand with feet wide; bend the front knee over the ankle.
- Rest right forearm on a block; extend left arm overhead.
- Keep spine long; gaze upward.
- Hold 20–30 seconds; switch sides.
How It Should Feel: Side body lengthens; legs strong; chest open; gentle core engagement.
Benefits: Opens hips and chest, strengthens legs, improves posture, enhances focus.
30. Reclined Bound Angle Pose
This pose relaxes the hips, inner thighs, and lower back. Lying back on a cushion keeps the belly supported while releasing tension. It’s ideal for restorative breathing and mindful relaxation.
Step-by-Step:
- Lie on your back; soles of feet together, knees apart.
- Place cushions under knees if needed.
- Rest arms by your sides; breathe deeply.
- Hold 2–3 minutes.
How It Should Feel: Hips open; spine lengthens; belly free; deep relaxation in breath and muscles.
Benefits: Opens hips, relieves lower back tension, supports pelvic floor, and encourages calmness.
Third Trimester (Weeks 28–40): Stability and Comfort
Prenatal yoga poses in this trimester focus on maintaining flexibility, strength, and calmness while accommodating a larger belly. Poses are modified for safety and ease.
31. Chair Pose (Utkatasana – Modified)
This pose strengthens the legs, glutes, and back while engaging core muscles safely. Using a wall for support prevents strain and helps maintain balance. As you hold the position, you should feel steady activation in your thighs and hips without any pressure on the belly. The wall also allows your spine to stay long and supported, giving you a controlled and confident stretch as your body adapts through pregnancy.
Step-by-Step:
- Stand with feet hip-width apart; spine tall.
- Bend knees slightly; lift arms overhead.
- Keep weight in heels; engage core gently.
- Hold 15–20 seconds.
How It Should Feel: Legs and glutes active; spine long; belly supported; chest open.
Benefits: Strengthens legs and core, improves balance, supports posture, and prepares muscles for labor.
32. Supported Warrior II
This version uses a chair or wall for support to safely open the hips and strengthen the legs. It promotes stability while improving endurance and circulation. The added support also helps you focus on smooth breathing and controlled movement without stressing your lower back or core.
Step-by-Step:
- Place right foot forward, left foot back; chair nearby for support.
- Bend front knee; extend arms sideways.
- Maintain steady gaze; hold 20–30 seconds; switch sides.
How It Should Feel: Legs strong; hips open; chest lifted; core stable.
Benefits: Opens hips, strengthens legs and core, improves posture, enhances focus.
33. Reclined Hero Pose with Support
This pose gently stretches the quads and hip flexors while supporting the belly. Cushions prevent pressure and increase comfort. As it can greatly help relaxation, this is one of the most important prenatal yoga poses in the third trimester.
You should feel a warm, lengthening stretch along the front of the thighs without any pulling in the lower back. The supported position also allows your breath to slow down, helping your body settle into a calm and steady rhythm.
Step-by-Step:
- Kneel on the mat; sit back on a cushion.
- Lean slightly back, supported by pillows.
- Breathe deeply; hold 1–2 minutes.
How It Should Feel: Thighs stretch; hips release; belly free; spine supported.
Benefits: Stretches quads and hips, relieves tension, promotes relaxation.
34. Cat-Cow Stretch (Modified for Belly)
A variation of Cat-Cow with space for the belly reduces pressure on the abdomen while improving spinal mobility. It encourages gentle back and core engagement. You should feel a smooth wave-like motion through the spine that eases stiffness without any strain. This gentle flow also supports steady breathing, helping your body relax while staying supported.
Step-by-Step:
- Hands and knees on mat; knees wider than hips.
- Inhale, arch spine (Cow); exhale, round spine (Cat).
- Repeat 5–8 times slowly.
How It Should Feel: Spine moves fluidly; chest opens; belly free; shoulders release.
Benefits: Improves spinal flexibility, relieves back tension, promotes circulation.
35. Side-Lying Pigeon Pose
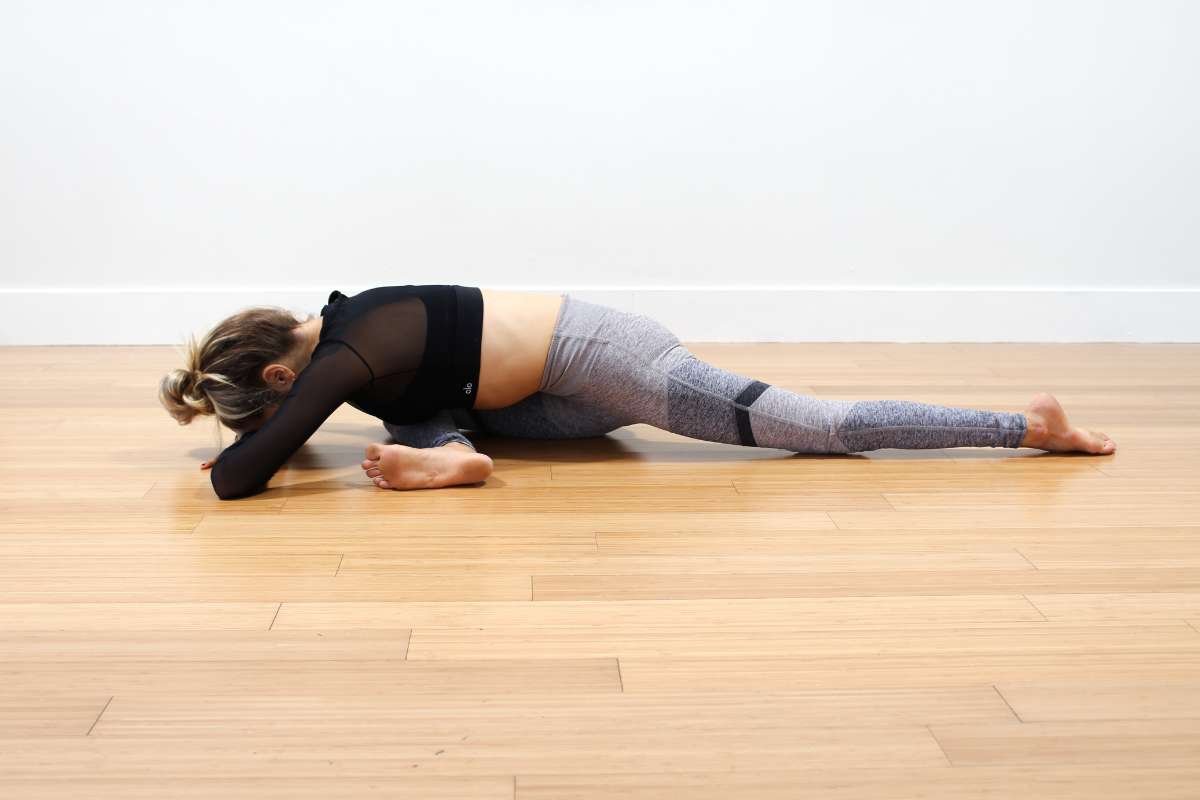
This pose opens the hips and relieves glute and lower back tightness. Lying on your side prevents strain on the belly while maintaining a deep stretch. You should feel a slow, steady release in the outer hips without any sharp pulling. The supported position also helps your body stay relaxed, making the stretch feel safe and soothing as pregnancy progresses.
Step-by-Step:
- Lie on the left side; bend the right leg and place the foot near the left knee.
- Adjust angle for comfort; hold 20–30 seconds.
- Switch sides.
How It Should Feel: Hips and glutes stretch; lower back relaxes; belly supported.
Benefits: Relieves hip and back tension, improves flexibility, promotes relaxation.
36. Supported Forward Fold on Chair
This forward fold stretches the back and hamstrings safely while sitting. Using a chair ensures the belly is free and prevents dizziness. You should feel a gentle lengthening along the spine and backs of the legs without any pressure on the abdomen. The supported seat also helps you stay steady, allowing the stretch to feel calm and grounded.
Step-by-Step:
- Sit on a chair; feet flat on the floor.
- Hinge forward from the hips; rest your torso on your thighs or another chair.
- Hold 20–30 seconds; breathe deeply.
How It Should Feel: Back and hamstrings lengthen; shoulders soften; belly comfortable.
Benefits: Relieves back tension, stretches legs, calms mind.
37. Wide-Legged Squat (Supported)
This pose strengthens the pelvic floor, thighs, and glutes. Using a wall or chair for support increases safety and stability. You should feel steady activation in the lower body without any wobbling or strain on the belly. The supported stance also helps you focus on smooth breathing, giving the pose a balanced and controlled feel.
Step-by-Step:
- Stand wide; toes slightly out; support from chair or wall.
- Lower hips slightly; spine tall.
- Hold 20–30 seconds.
How It Should Feel: Legs strong; hips open; spine upright; gentle stretch in groin.
Benefits: Strengthens legs, improves pelvic flexibility, and relieves lower back strain.
38. Legs Up the Wall (Viparita Karani)
A restorative pose that promotes circulation and relieves leg swelling. The belly rests comfortably, reducing strain on the back.strain on the back. ver a few breaths, you may notice warmth spreading through the hips and thighs as tension fades. This quiet release often brings a peaceful stillness, making the pose feel both soothing and renewing. The support under your body also helps the lower back relax, creating a calm, grounded feeling as you rest.
Step-by-Step:
- Lie on your back near a wall; legs extended upward.
- Support your lower back with a pillow.
- Rest arms by your sides; breathe deeply for 2–3 minutes.
How It Should Feel: Legs and feet relax; lower back supported; breath calm; gentle inversion sensation.
Benefits: Reduces swelling, improves circulation, relieves fatigue, promotes relaxation.
39. Seated Side Stretch with Chair
This gentle side stretch opens the ribs and side torso while sitting. A chair supports stability and prevents balance issues. As you lean to the side, you should feel a smooth, lengthening stretch along the ribs without any pulling in the belly. The movement creates more space for breath, which often feels refreshing during pregnancy. Over time, the stretch helps release stiffness in the waist and upper body, making everyday movements feel easier.
Step-by-Step:
- Sit sideways on the chair; feet flat.
- Raise right arm overhead; lean gently to the left.
- Hold 15–20 seconds; switch sides.
How It Should Feel: Side body stretches gently; spine long; shoulders relaxed.
Benefits: Opens ribs, improves lung capacity, relieves upper back tension.
40. Reclined Supported Relaxation (Savasana)
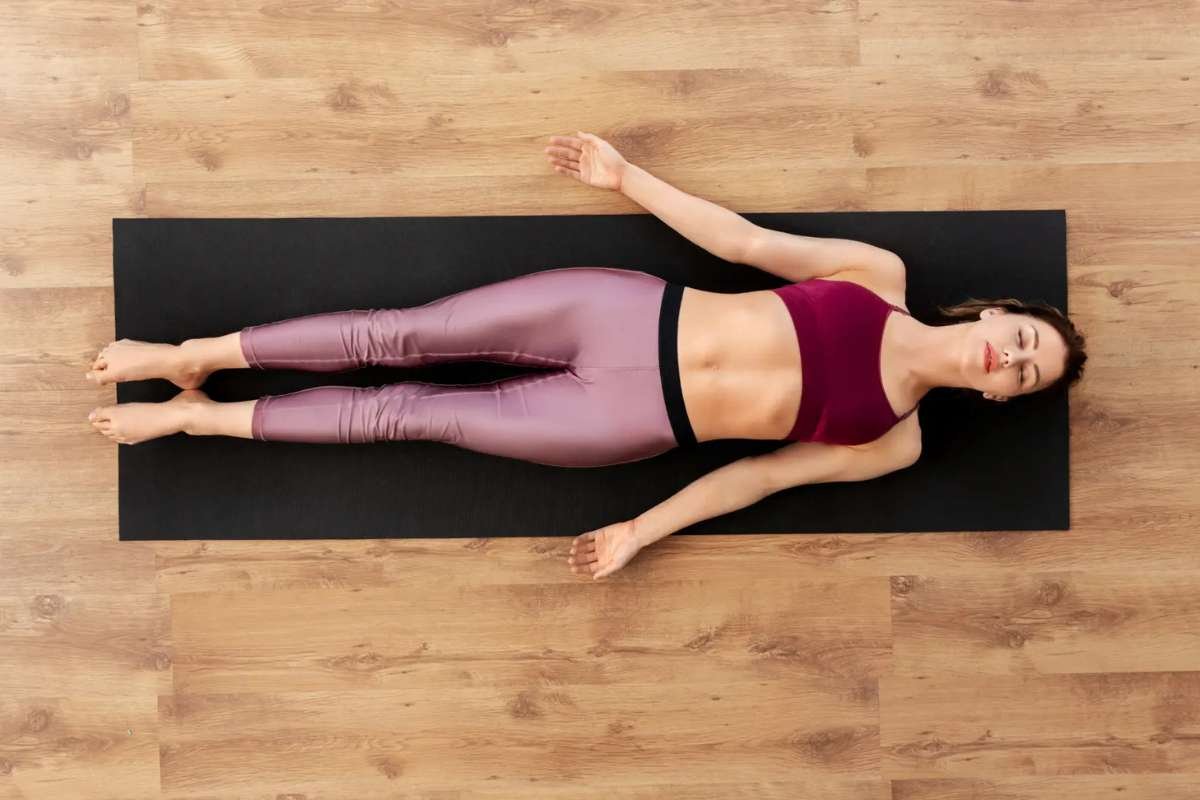
A restorative pose that allows full-body relaxation with belly support. It promotes calmness, reduces stress, and prepares the body for labor. The gentle support under the belly helps your spine release tension, creating a sense of ease through the back and hips. With time, the pose often brings a quiet, steady rhythm to the breath that feels grounding and deeply soothing.
Step-by-Step:
- Lie on your back with pillows under your knees and head; support your belly with a cushion if needed.
- Rest arms by sides; close eyes.
- Breathe deeply for 3–5 minutes.
How It Should Feel: Entire body releases; belly comfortable; mind calm; muscles relaxed.
Benefits: Promotes total relaxation, reduces stress, eases back and hip tension, supports emotional balance.
Tips & Safety Guidelines for Prenatal Yoga Poses
Tip 1: Consult your doctor first- Always get clearance before starting or continuing prenatal yoga poses, especially if you have any pregnancy complications or health concerns.
Tip 2: Use props and modify poses- As your body changes, balance shifts, and joints loosen. Props like blocks, bolsters, cushions, or a chair help maintain proper alignment, reduce strain, and make poses safer.
Tip 3: Avoid risky positions- Skip deep abdominal twists, strong backbends, intense inversions, and lying flat on your back for long periods after the first trimester. These may reduce blood flow to the uterus or place unnecessary strain on the belly.
Tip 4: Focus on steady, comfortable breathing- Keep your breath smooth and even throughout your practice. You should be able to speak a sentence while holding a pose if you cannot, you may be pushing too hard. Controlled breathing also helps reduce anxiety and stress.
Tip 5: Stay hydrated and practise in a comfortable environment- Drink water before and after sessions. Avoid hot yoga or heated rooms, as elevated core temperature can affect both mother and baby.
Tip 6 Practice consistently, not intensely: Short, regular sessions of prenatal yoga poses are more effective than infrequent, long sessions. According to the American Pregnancy Association, you should moderate your yoga routine to up to 30 minutes.
Tip 7: Choose a certified prenatal instructor: A trained teacher ensures correct alignment, safe modifications, and guidance tailored to each trimester. This reduces the risk of injury and builds confidence in your practice.
Conclusion
Prenatal yoga poses offer physical relief during pregnancy. They help expecting mothers build strength, stay flexible, and maintain emotional balance. Practicing these poses regularly can ease discomfort like back pain, improve circulation, and prepare the body for labor.
Beyond the physical benefits, prenatal yoga fosters mindfulness, reduces stress, and strengthens the bond between mother and baby. By incorporating these poses into a daily routine, mothers-to-be can enjoy a healthier, calmer, and more confident pregnancy journey.
Also Read :
- Fertility Tech in 2025: Simple Guide to the Future of Parenthood
- What to Eat When You’re Expecting: The Best Foods for Pregnancy
FAQ
1. Are prenatal yoga poses safe for all stages of pregnancy?
Most poses are safe throughout pregnancy, but always consult your doctor and avoid poses that put pressure on the abdomen or involve deep twists.
2. How often should I practice prenatal yoga?
Practicing 3–5 times a week for 20–30 minutes is ideal, but even shorter daily sessions can be beneficial.
3. Can prenatal yoga poses help with stress and anxiety during pregnancy?
Absolutely. The poses combine gentle movements with breathing exercises and mindfulness, helping reduce stress, improve mood, and promote emotional well-being.